The distinction between buying and saving seed is often considered to be one of cost, but there are several reasons that people, especially vegetable gardeners, like to save their own seed:
- Price – saving your own seed can be a way of reducing the costs of gardening, and if you attend seed swaps you may also get interesting seeds for free that you couldn’t afford to buy.
- Variety – certain kinds of seed, especially heirloom varieties, may be specifically adapted to local conditions and produce flowers, fruit or vegetables that grow well in those conditions or that avoid or resist local pests or damaging weather conditions.
- Preservation of rare varieties – some seed varieties are rare and unusual and cannot be conserved in the usual way (seed banks) and so they have to be grown and harvested regularly to keep that genetic strain alive and available.
Jump To...
What Kinds of Seed to Save and Which to Avoid
F1 Hybrid Seed – this is a seed that has been harvested from the primary (first) cross‐pollination of two otherwise unrelated plants. The parent will have been chosen for attributes that combine to offer an improved plant: the usual characteristics sought are increased vigour, faster growth, resistance to predators and diseases, and greater productivity. Because seed from any F1 hybrid plant will be unpredictable: displaying random characteristics from either parent or even grandparent, each generation of F1 seed has to be specially bred. The process of choosing specific attributes to produce greater gains in the first generation (plant breeding) is called heterosis and usually requires scientific input and complex harvesting procedures. There is no point saving seed from F1 hybrids if you wish to have a reliable crop, harvest or display.
Open‐Pollinated Seeds – bees, other insects, wind‐borne pollen and other routes all play a part in open pollination. Always bear in mind that as a seed saver you may not know the original parent plants and cannot control where pollen comes from or how it is conveyed. This means that plants will produce seed that has been pollinated by other compatible plants nearby and that seed saved from open‐pollinated plants will probably, but not definitely, produce a similar mixture of colour, size, height and crop to the parent plants.
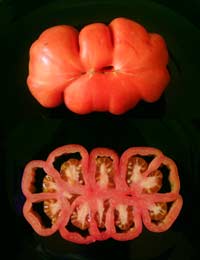
Heirloom Seed – this is a social, rather than scientific, label which is applied to certain kinds of seed (usually vegetable or cereal) grown in relative isolation in a particular area. This produces a crop that will have characteristics specifically related to high productivity and ease of growth in that geographical location. Heirloom varieties are therefore valuable and worth saving in they crop well in your area, but may not produce a good crop elsewhere. It’s important to remember that to keep the desired characteristics you must stop them cross‐pollinating (via open pollination) with nearby compatible varieties. As a result, some people save their own heirloom seed but many buy new seed each year.
Locating the Seeds
For a novice saver, the biggest concern may be in locating the seed to harvest. Basically, in most flowering crops the seed will be where the flowers were. So a pumpkin grows its huge bulk from behind a single flower, and a poppy keeps its seed in the capsule below the flower blossom. Seeds are usually found at the base of the style – this is the long tube in the middle of a flower, which is usually surrounded by stamens carrying pollen but in a few trumpet forming flowers (daffodil, squashes) the seed pod forms behind the flower.
Deciding When to Harvest
Knowing when seed is ripe is the key to successful harvesting – seed goes through three stages: formation, maturation and ripening. Seed pods need to become large enough to contain viable seed, and then the seed inside them needs to mature so that it reaches full size, after which it ripens to become ‘viable’: which means it can produce a new plant. Usually a seed pod dry and changes colour from green to beige, brown or black and the seeds inside it become hard‐cased and alter from green, white or yellow to brown or black.
Seed Saving Equipment
The minimum equipment requirement for seed‐saving is: paper bags, small envelopes, indelible pen and a box or basket to carry your equipment in. You may find a digital camera useful, as it helps record the location and condition of the plant from which you harvest, but it’s not essential.
When saving seed, ensure that if you take the entire seed head you put it upside‐down in a paper bag and give it a good shake to release all the seeds from their capsules. If you are harvesting individual seed, it is still better to put it in a bag at first, as this gives you the chance to examine the seed before you put it in envelopes and remove any non‐viable (damaged, unripe or deformed) seed that could reduce the chances of good germination overall. Label the bag immediately and then re‐label the envelopes when you move the seed to them. Remember to include the common and Latin names if you know them, the place you harvested the seed, and the date of harvest. Also note any specific details that may influence germination such as the weather conditions.
Ideal Harvesting Conditions
Always harvest seed in dry weather – mid‐morning to mid‐afternoon on a sunny but not windy day is perfect. Damp seed will usually rot when harvested or ‘damp off’ when you try to grow plants from it.